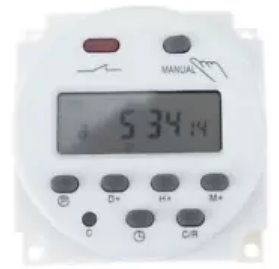
Ich setze die Timer gern für Akkuprojekte ein und bin sehr zufrieden damit.
Einfache Bedienung.
Stromaufnahme mit Relais = On: ca. 30mA
5V Modell:
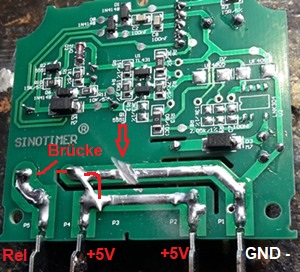
ACHTUNG! 5V Uhr schaltet Minus - muss umgeändert werden.
I like using this timer for battery-powered projects and am very satisfied
with it.
Simple operation.
Current consumption with relay ON: approx. 30 mA
5V model:
ATTENTION! The 5V clock switches the negative side - this must be modified.
Bedienung
Operating Instructions
Den aktuellen Tag und die Zeit einstellen
Set the current day and time
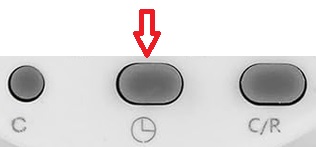
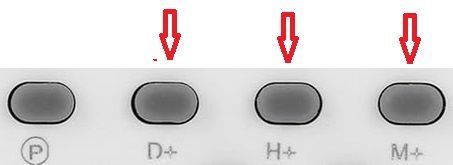
Halten Sie die Clock-Taste gedrückt und drücken Sie zusätzlich
die D+/Day, H+/Hour bzw. die M+/Minute-Taste, bis Sie den Tag,
die richtige Stunde und die richtige Minute eingestellt haben.
Press and hold the Clock button while simultaneously pressing
the D+/Day, H+/Hour, or M+/Minute button until you have set the day, the
correct hour, and the correct minute.
Die Programme einstellen
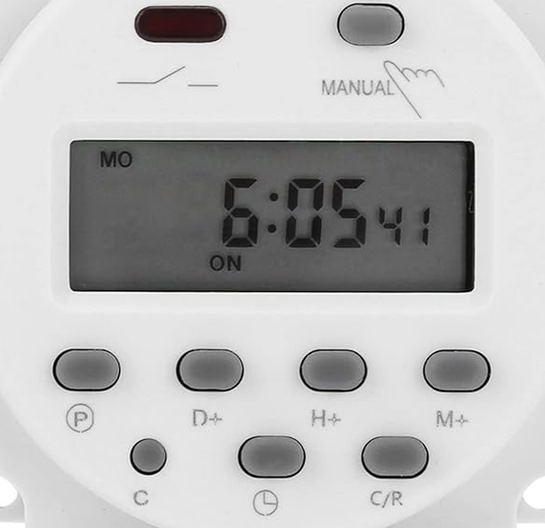
1.) P-Taste drücken, LCD Anzeige zeigt 1on --:-- an.
2.) Drücken Sie mehrmals die D+ Taste, um eine der 15 voreingestellten Wochentagskombinationen
auszuwählen. Am Ende kann man auch einzelne Tage auswählen
3.) Drücken Sie H+ bzw. M+ Taste und stellen Sie die gewünschte Stunde bzw. Minute mit 1on ein.
4.) Nachdem Sie die Einschaltzeit 1on gesetzt haben, drücken Sie erneut die Taste P und 1off
wird auf der LCD Anzeige angezeigt.
5.) Schritt 2 und 3 wiederholen.
6.) Für weiter on-off Zeiten einfach wieder auf P drücken. 2on wird angezeigt usw..
Wenn Sie mit der Programmierung fertig sind, drücken Sie die Clock-Taste (nur einmal kurz) und
die Zeitschaltuhr ist fertig eingestellt.
Überprüfung der Zeitschaltprogramme
Um die Programme zu überprüfen drücken Sie P mehrfach, dann zeigt Ihnen die
LCD Anzeige jedes der 1 bis 17 voreingestellten Programme mit on/off an.
Mit der C/R Taste kann mann alle Programmierungen löschen.
Direktes Schalten der Uhr
Setting the programs
1.) Press the P button; the LCD display shows 1on --:--.
2.) Press the D+ button repeatedly to select one of the 15 preset day-of-the-week combinations.
Individual days can also be selected.
3.) Press the H+ or M+ button to set the desired hour or minute for 1on.
4.) After setting the switch-on time (1on), press the P button again; 1off
will appear on the LCD display.
5.) Repeat steps 2 and 3.
6.) For additional on/off times, simply press P again. 2on will be displayed, etc.
When you have finished programming, press the Clock button (briefly, just once)
and the timer setup is complete.
Checking the timer programs
To check the programs, press P repeatedly; the
LCD display will show each of the 17 preset programs (on/off).
All programmed settings can be deleted using the C/R button.
Manual switching
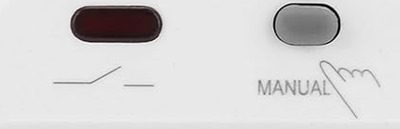
Auf Druck von MANUEL wird die Uhr in drei Zustände versetzt: ON, AUTO oder OFF
1.) ON: unabhängig von der Programmierung wird auf Durchgang geschaltet. Rote Led leuchtet.
2.) AUTO: Die Programme werden zeitgemäß abgearbeitet.
3.) OFF: unabhängig von der Programmierung wird der Durchgang ausgeschaltet. Rote Led geht aus.
Pressing the MANUEL button switches the timer to one of three states: ON, AUTO, or OFF
1.) ON: Switches to "on" (circuit closed), regardless of programming. Red LED lights up.
2.) AUTO: Programs are executed according to the schedule.
3.) OFF: Switches to "off" (circuit open), regardless of programming. Red LED turns off.